Title

Wild Side of the Menu No. 2: Field to Freezer

(FN125, Reviewed August 2022)
Summary

Each year, hunting of animals and birds is increasingly popular, but often the game is wasted because of improper handling in the field. Nutritionally, game meats rate as well as domestic animals and may prove to be a healthier source of nutrition. Wild game that is properly treated in the field and correctly cooked to enhance its distinctive flavors holds a special place for many gourmets. The purpose of this publication is to describe how to properly handle your game from harvesting through processing.

Lead Author
Lead Author:
Julie Garden-Robinson, Ph.D., R.D., L.R.D., Food and Nutrition Specialist
Other Authors

Martin Marchello, Ph.D., Professor Emeritus, Department of Animal Sciences, NDSU

Availability
Availability:
Web only
Publication Sections

Each year, hunting of animals and birds is increasingly popular, but often the game is wasted because of improper handling in the field. Nutritionally, game meats rate as well as domestic animals and may prove to be a healthier source of nutrition. Wild game that is properly treated in the field and correctly cooked to enhance its distinctive flavors holds a special place for many gourmets.

The purpose of this publication is to describe how to properly handle your game from harvesting through processing.

Before the Hunt: New Concerns

Concern has grown in recent years about a disease affecting deer and elk called Chronic Wasting Disease (CWD), which belongs to a family of diseases known as Transmissible Spongiform Encephalopathies (TSEs). CWD symptoms include weight loss, stumbling, tremors, lack of coordination, blank facial expressions, excessive salivation, loss of appetite, excessive thirst and urination, listlessness, teeth grinding, abnormal head posture and drooping ears.

Hunters should be vigilant for identifying deer or elk displaying CWD symptoms and report suspected cases to wildlife officials immediately. Many states have specific CWD guidelines for hunters. Hunters need to know not only the CWD regulations of the states in which they hunt, but also those of the states in which they may pass through during interstate hunting trips.

To date, there is no evidence that CWD has been transmitted or can be transmitted to humans under natural conditions. However, neither is there strong evidence that such transmissions could not occur. Research thus far indicates that the abnormal proteins responsible for causing CWD accumulate only in the brain, eyes, spinal cord lymph nodes, tonsils, pancreas and spleen—but not in muscle tissue.

Therefore, hunters should take a few simple precautions when handling and transporting deer or elk carcasses:

  • Do not shoot, handle or consume any wild animal that appears sick.
  • Wear rubber gloves when field dressing and processing animals.
  • Request that commercial processors handle animals individually so meat from other animals won’t become commingled.
  • Minimize handling brain or spinal tissues and fluids.
  • Bone out carcasses or at least avoid consuming brain, spinal cord, eyes, spleen and lymph nodes of harvested animals.
  • Do not consume the meat from any animal that tests positive for CWD.

Preparing for the Hunt

It is important to be properly prepared for hunting. Check to see that you have all of the equipment needed not only for hunting but also for handling your kill. This publication will discuss deer, but the principles apply to other large animals such as elk, moose, bear, antelope or mountain sheep.

A sharp hunting knife, small hatchet, 12 feet of light rope or nylon cord and a cloth to wipe out the dressed carcass and clean hands are essential. If the weather is hot, you probably will have to skin your deer to ensure proper cooling; then cheesecloth and a can of black pepper are needed to protect the deer carcass from flies. Be sure to adhere to the game laws and fasten your deer tag before moving the deer.

Conspicuous clothing which complies with state laws and is appropriate for the weather, binoculars, a compass, map and matches add to the safety of the hunt. The hunter should carry a clean gun of the right caliber sighted in with proper ammunition.

Field Dressing

Generally, the deer you shoot will not have to be bled out because enough blood vessels will be severed by the bullet. A carefully placed shot in the heart, lung or neck region will prevent mutilating the choice meat cuts and it also will prevent the loss of a wounded deer. Avoid shooting the deer in the head or neck if you want to mount the head as a trophy. Shoot in the heart or lung area of the animal if it is a trophy buck. This will preserve the cape and head for mounting. Approach a downed deer with caution and be ready for another shot. If the deer is still struggling, place another shot in the neck just behind the ear.

The sooner you dress the deer after shooting, the better the meat will be. Quick dressing ensures rapid loss of body heat and prevents any fermentation from the guts entering the flesh. To dress, place the animal on its back with the front end elevated and spread the hind legs. Open up the midline of the carcass by cutting from the breast to the rectum. Avoid cutting the paunch and intestines by using the handle of the knife and your hand to crowd the guts away while making the cut along the midline (Figure 1).

Figure 1 Field Dressing
Figure 1 - Field Dressing

You may want to split the breast bone and the aitch bone, but this is not necessary. In fact, if you have to drag the deer out of the woods, it will stay cleaner if you don’t split the breast and aitch bones. Splitting can be done with a knife unless the deer is very old. Then you may have to use a hatchet or saw to split the bones. Cut around the anus, loosening the bung so that it will come out with the rest of the guts. Now cut the diaphragm free of the rib cage. Reach forward to cut the windpipe, gullet and blood vessels.

Then pull the lungs, heart and guts out of the animal (Figure 2). Save the heart and liver if you like variety meat. Finish cleaning the deer by removing any remaining viscera and drain all excess blood from the body cavity. Wipe dry with a clean cloth and hang the deer up by the head to hasten cooling the carcass. The scent glands on the inside of the legs at the hock can be removed at this time or left intact (Figure 1). Research at Utah State University indicates that the scent glands do not cause off flavors or odors.

Figure 2 Field Dressing
Figure 2 - Field Dressing

Skinning a Deer

The temperature and condition of the deer dictates whether or not you should skin the carcass right after you dressed it or leave the pelt for transporting home. If the ambient temperature is cool, it is preferable to leave the hide on the carcass because this prevents excessive drying, avoids discoloration and keeps the carcass clean.

The secret to skinning out a deer is to use the knife as little as possible and to pull and fist the pelt. This generally will give you a nice appearing carcass and pelt relatively free of meat scraps, fat and hide cuts.

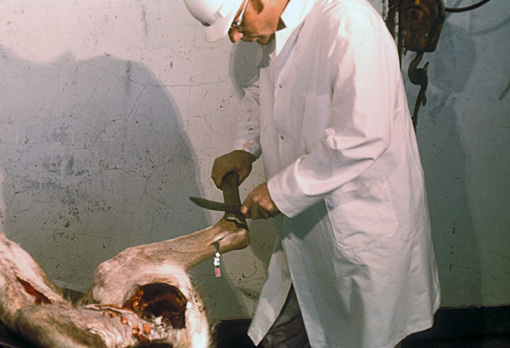
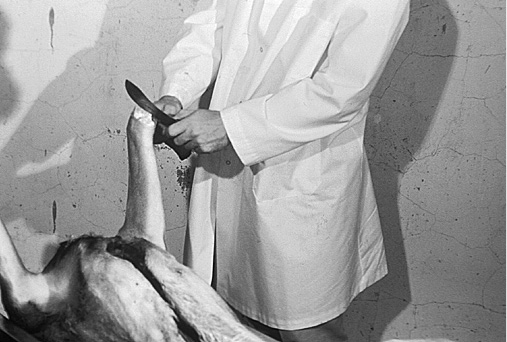
Begin by removing the forelegs at the smooth joint just below the knee and the hind legs at the break joint below the hock (Figures A and B).

Figure A. Removing foreleg at knee joint.
Figure B. Removing hind leg or hock.

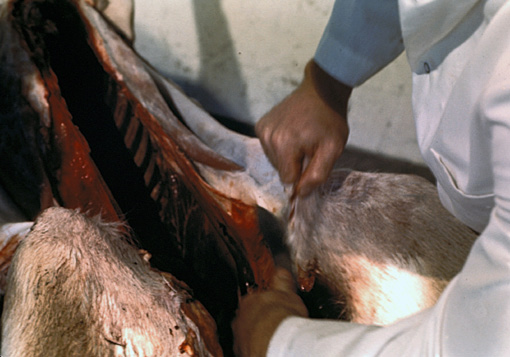
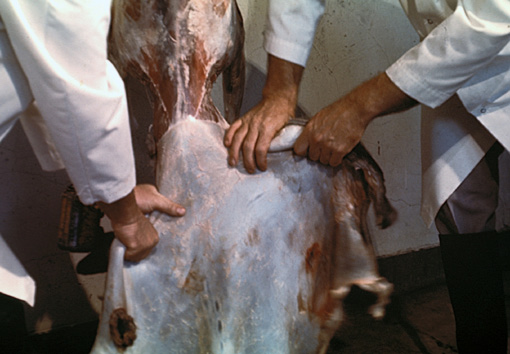
Open the skin at the bung to the hock and skin along the midline of the carcass (Figures C and D).

Figure C. Loosening pelt along flank.
Figure D. Loosening pelt along leg.

Skin out the foreshanks so that the pelt will be pulled from the carcass more easily. Make an opening between the tendon and the hock to insert a gambrel and hoist the carcass up in order to pull the pelt from it.

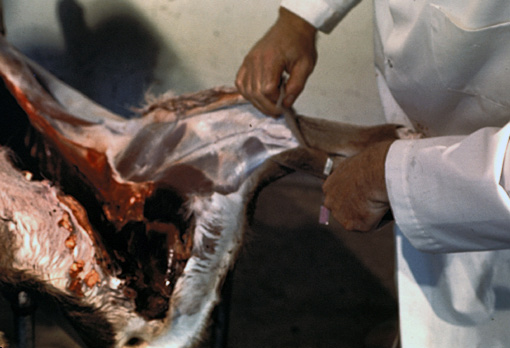
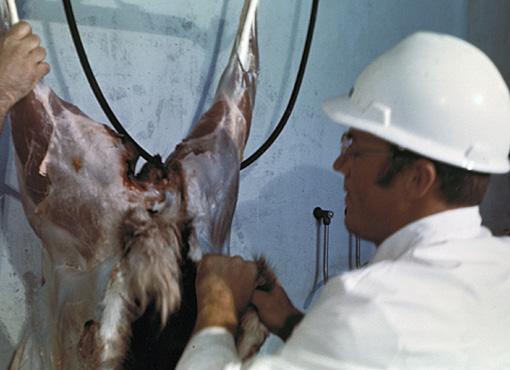
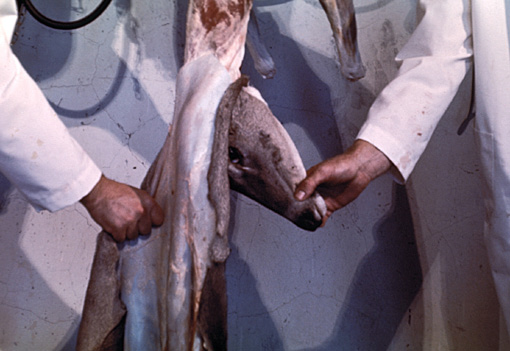
Now you can pull the pelt over the haunches, down the loin and back and over the shoulders. If some flesh comes with the pelt, cut it off with your knife or fist it back. Remove the head at the atlas joint. This is the connection between the head and the first vertebra of the neck where the head is removed from the spinal column. (Figures E, F and G.)

Figure E. Pulling pelt from rounds.
Figure F. Pulling pelt from shoulder and neck.
Figure G. Pulling pelt from neck and removal of head at atlas joint.

If the head is to be mounted, do not open the pelt on the underside of the neck. Apply fine non-iodized salt to the pelt and head and ship it to a taxidermist for mounting and tanning. Clean up the carcass with plenty of clean water and remove any extraneous material. Refrigerate the carcass. If you do not have proper storage space for the carcass, cut, wrap and freeze it as soon as possible.

Many individuals like to age their game before processing. If you do not have the proper cooler space this will result in some spoilage (microbial growth) and dehydration. Furthermore, many hunters grind their venison to make sausage so you don’t’ have to worry about tenderness. A more detailed discussion of aging is presented in publication FN-124, “Wild Side of the Menu No.1, Care and Cookery.” The sooner you take care of your game meats and freeze the product, the more you will enjoy your game meats.

Muscle Boning Venison

Muscle boning a deer is a convenient way to take care of venison. It can be done on a kitchen table with a good sharp boning knife. It is not particularly difficult and has several advantages over conventional methods. It allows you to separate the meat into more selective pieces, taking up less freezer space, and is easier for the cook to handle and use. Furthermore, you will eliminate the spinal cord and lymph nodes, which is material that might be associated with Chronic Wasting Disease.

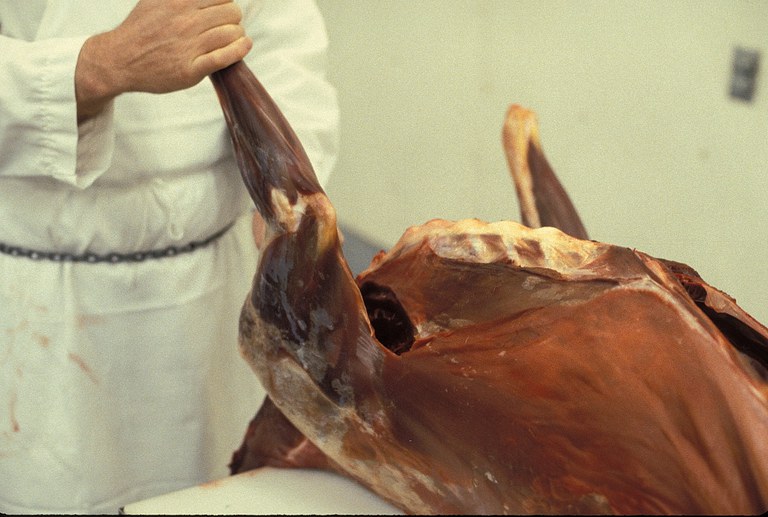
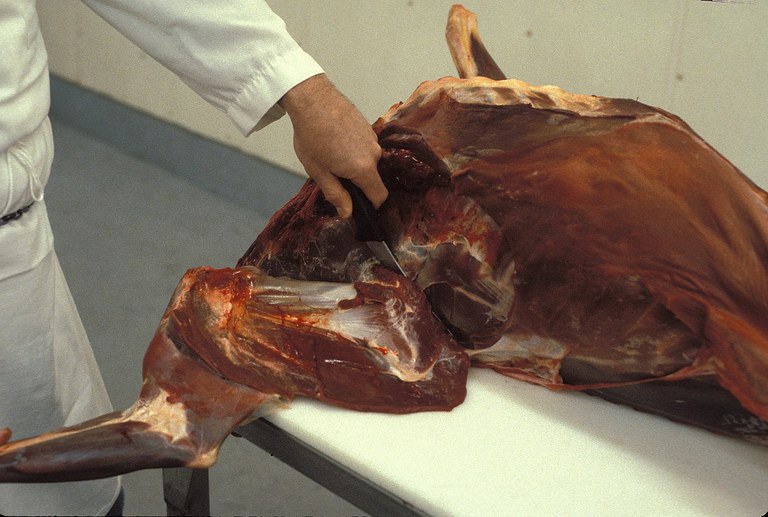
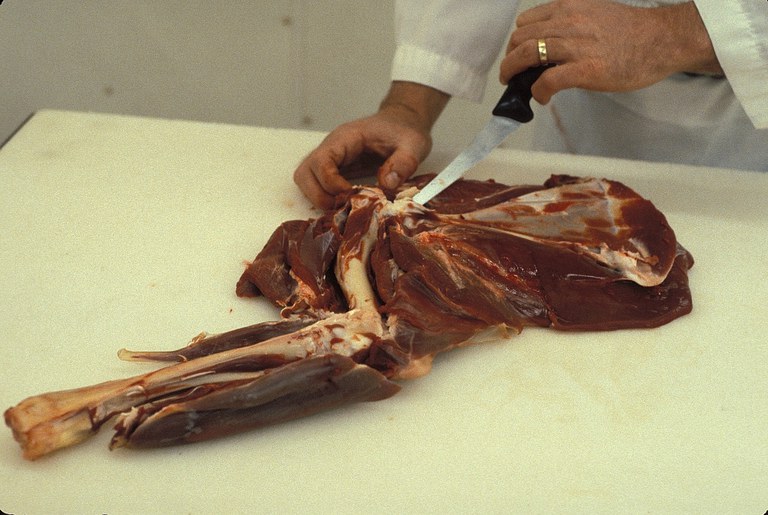
To begin, lay the carcass on the table. Start by removing the shoulder. Cut between the chest and front leg and follow along the neck line beneath the shoulder blade (Figure 3).

Figure 3. Removing shoulder.

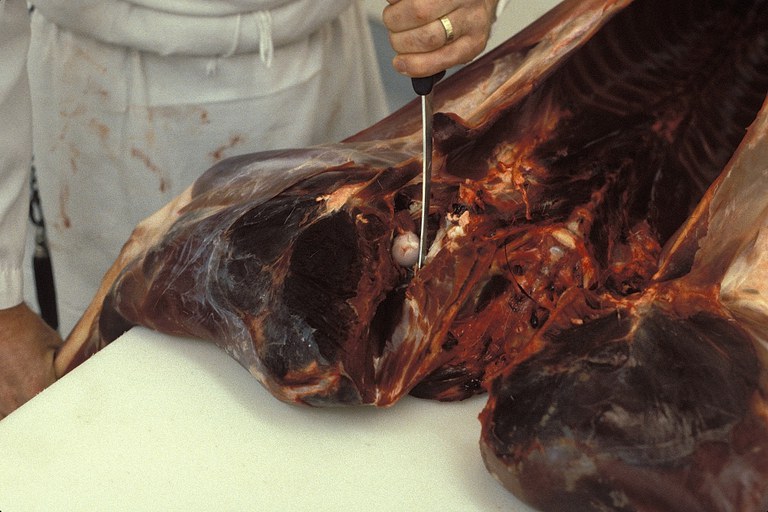
Finally, remove the shoulder at the top of the withers (Figure 4).

Figure 4. Removing shoulder.

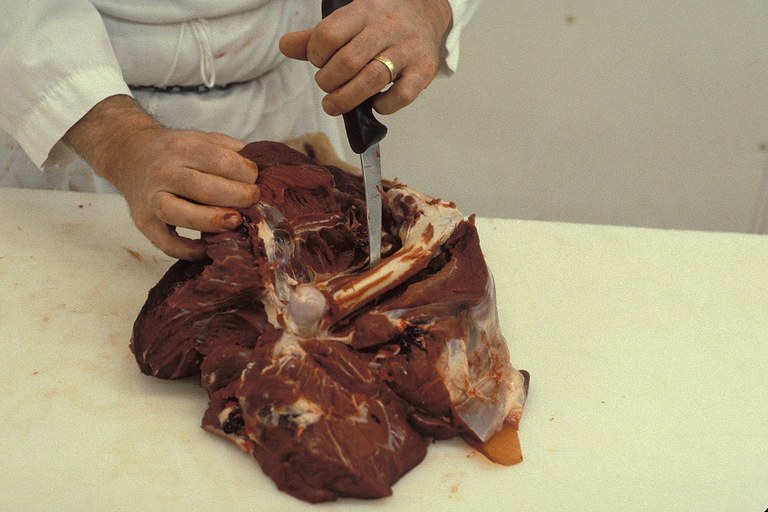
The shank is trimmed out for venison burger or sausage. The blade bone and arm bones are removed by separating the meat away from these bones (Figure 5). Then, the flesh is rolled and tied together with a string to make a boneless shoulder roast.

Figure 5. Boning the shoulder.

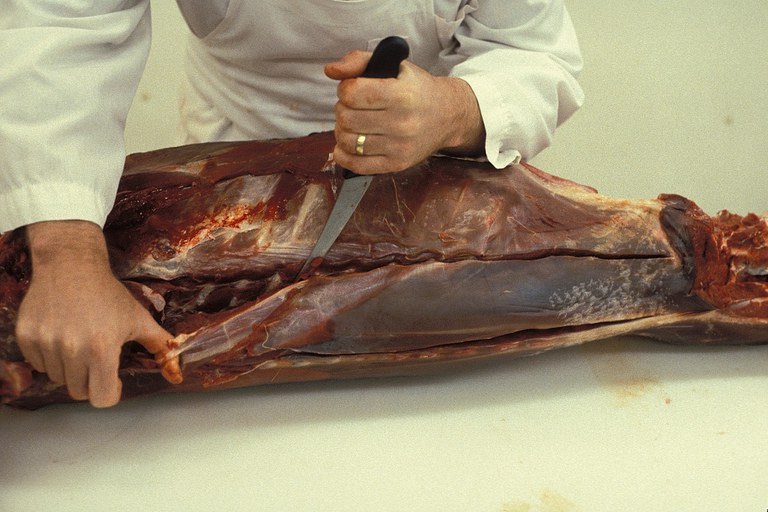
Next, remove the hind leg by following behind and adjacent to the pelvic (hip) bone and cutting the leg bone away from the hip joint (Figure 6). Continue boning out the hind leg by following along the shank and extending the cut up to the leg bone (Figure 7).

Figure 6. Removing hind leg from carcass.
Figure 7. Boning out hind leg.

Next, cut from the knee cap along the front muscle to where the leg bone was attached to the pelvic bone. Remove the leg bone and you are left with the boneless leg consisting of the sirtip, outside leg and inside leg. These pieces can be separated along their natural seams and thus be used as roast, jerky or sliced into steaks.

Remove the loin by cutting along the ribs from the front to the rear of the carcass (Figure 8).

Figure 8. Removing loin.

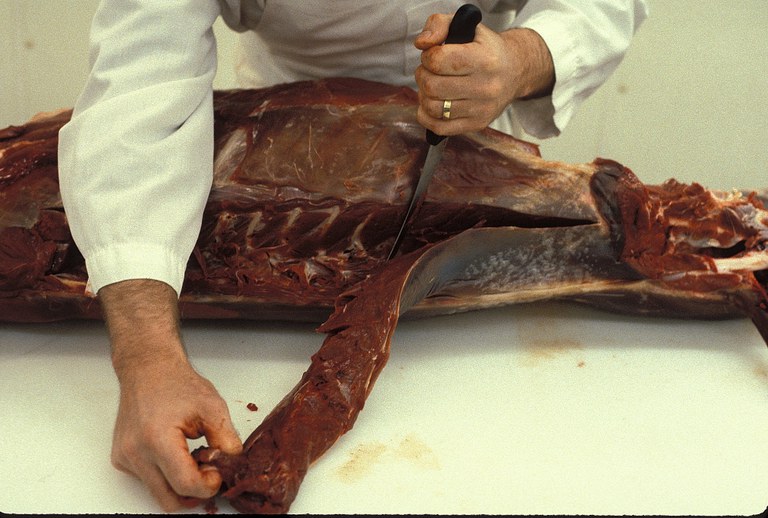
Score along the vertical spine of the back line and then remove the loin by cutting and peeling it loose from the groove between the ribs and backbone (Figure 9).

Figure 9. Removing loin.

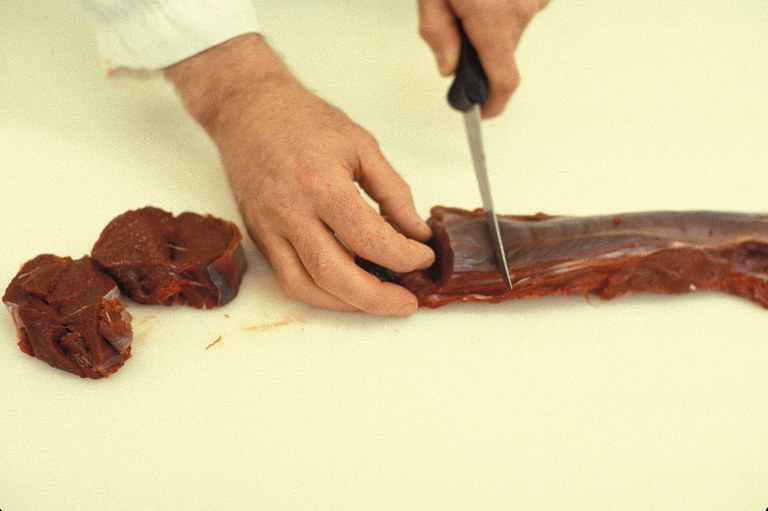
After you have stripped out the loins, pull off the excess fat and cut into boneless loin chops. The tenderloin muscle is on the inside of the cavity. It can be stripped away from the backbone as described. Sometimes the chops from the loin and tenderloin are quite small; then one can butterfly them to make the steaks larger in diameter. A butterfly steak is two steaks lying side by side and connected by the same tissue at one edge (Figure 10). The remainder of the unsoiled meat on the rib, flank and neck and/or skeleton can be trimmed off and used for sausage trimmings or ground venison. You may find it easier to remove the shoulder, leg and loin from a hanging carcass and then finish the process as previously described.

Figure 10. Cutting butterfly steak.
Wrapping and Freezing

After you have cut the deer into desired cuts, you are ready to wrap and freeze it. Select a good-quality freezer wrap and put interleaving paper between your steaks. This enables you to remove as many from the package as you desire when not all of the family is home. Also, you can then cook the steaks while in the frozen state. Heavy-duty aluminum foil, polyethylene bags or laminated freezer wrap are good materials to use for freezing. Date and label all packages. Properly wrapped venison, like meat of other ruminants, will keep three to four months in your freezer.

Table 1 shows the average weight in pounds of some game animals by stages of processing. Average yield of lean edible tissue of game animals by various stages of processing are shown in percentages in Table 2.

Table 1. Average weight of various stages of processing.

Species

Whole Body*

Field Dressed**

Carcass***


Pounds

*Whole body is the weight of the entire animal minus blood lost during harvest.

**Field dressed is the whole body weight minus the entrails.

***Carcass is the field dressed weight minus head, legs and hide (skins and feathers).

Whitetail Deer

148

115

96

Mule Deer

137

107

89

Elk

555

384

312

Moose

914

666

498

Antelope

96

74

60

Pheasant

2.6

2.2

1.6

Grey Partridge

0.85

0.74

0.53

Sharp-tailed Grouse

1.8

1.4

1.0

Sage Grouse

3.4

2.8

2.1

Mallard

2.4

2.2

1.3

Gadwall

1.7

1.3

0.75

Blue Wing Teal

0.89

0.71

0.38

Snow/Blue Goose

5.1

4.00

2.3

Canada Goose

6.0

4.8

3.0

Sandhill Crane

8.5

6.7

4.8

Table 2. Average yield of lean edible tissue of game animals by various stages of processing.

Species

Whole Body*

Field Dressed**

Carcass***


Percent

*Whole body is the weight of the entire animal minus blood lost during harvest. Example: If a whitetail deer weighed 200 pounds, then 200 x 51.7% = 103.4 pounds of edible lean boneless tissue.

**Field dressed is the whole body weight minus the entrails. Example: If a whitetail deer dressed 150 pounds, then 150 x 61.1% = 91.6 pounds of edible lean boneless tissue.

***Carcass is the field dressed weight minus head, legs and hide (skins and feathers). Example: If a whitetail carcass weighed 100 pounds, then 100 x 71.6% = 71.6 pounds of edible lean boneless tissue.

Whitetail Deer

51.7

61.1

71.6

Mule Deer

42.7

54.2

64.9

Elk

40.1

54.1

65.7

Moose

36.5

50.3

67.0

Antelope

42.6

55.2

68.4

Pheasant

45.6

51.3

70.8

Grey Partridge

42.8

49.3

67.8

Sharp-tailed Grouse

41.3

54.3

69.0

Sage Grouse

41.5

50.4

68.7

Mallard

34.0

35.9

65.4

Gadwall

25.4

33.8

61.6

Blue Wing Teal

26.7

34.3

59.4

Snow/Blue Goose

30.9

38.7

67.2

Canada Goose

32.6

40.3

62.5

Sandhill Crane

35.0

45.1

60.9

More information available from the NDSU Extension Service

“Wild Side of the Menu, No.1, Care and Cookery” (FN-124) provides information on nutrient content, food safety and preparation of wild game.

Wild Side of the Menu, No. 3, Preservation of Game Meats” (FN-155) provides information on drying, smoking, pickling and canning game meats.

SEPTEMBER 2003
Reviewed November 2017

NDSU Extension